A comprehensive guide to transforming any room with natural-looking light regardless of structural constraints
Last Updated: May 1, 2025
Table of Contents
- Introduction: Bringing Natural Light Indoors
- Understanding Artificial Skylights
- Pre-Installation Considerations
- Installing in Drywall Ceilings
- Installing in Suspended Ceilings
- Installing in Concrete Ceilings
- Cost Analysis and Budgeting
- Maintenance and Longevity Tips
- Frequently Asked Questions
- Conclusion and Final Recommendations
1. Introduction: Bringing Natural Light Indoors
Have you ever walked into a windowless room and immediately felt the oppressive weight of artificial lighting? Or perhaps you've longed for the cheerful ambiance of natural daylight in a basement or interior space? Installing artificial skylights offers a revolutionary solution to these common challenges, bringing the illusion of natural sunlight and blue skies into any space—regardless of its location within your home or building.
According to recent research by the Lighting Research Center, exposure to natural daylight cycles can improve mood by up to 40% and increase productivity by 15%. Yet surprisingly, over 30% of residential spaces and 47% of office environments lack adequate natural light. This lighting deficit has created a rapidly growing market for artificial skylight solutions that mimic natural light patterns.
Whether you're dealing with a standard drywall ceiling, a commercial suspended grid, or a challenging concrete structure, this comprehensive guide will walk you through everything you need to know about selecting, installing, and maintaining artificial skylights that transform your space. We'll cover installation techniques specific to each ceiling type, recommended products for different scenarios, and practical tips to ensure your installation looks authentic and functions flawlessly.
By the end of this guide, you'll have all the knowledge needed to bring the outdoor sky indoors—no structural renovations or roofline alterations required.
2. Understanding Artificial Skylights
Before diving into installation specifics, it's essential to understand what artificial skylights are and how they differ from traditional options. Unlike conventional skylights that require cutting through your roof, artificial skylights are lighting fixtures designed to mimic natural daylight and create the visual illusion of a real skylight—without any structural modifications to your building's exterior.
2.1 Types of Artificial Skylights
The market offers several distinct types of artificial skylight systems, each with unique features and installation requirements:
- LED Panel Skylights: Flat LED panels with specialized diffusers that create realistic sky effects. These are the most common and versatile option, available in various sizes and light temperature settings.
- Recessed Box Skylights: These create a recessed "light well" in the ceiling with LED lighting behind diffuser panels, creating depth and a more realistic skylight appearance.
- Smart Artificial Skylights: Advanced systems that change color temperature throughout the day to mimic natural light cycles, often controllable via smartphone apps.
- Edge-Lit Artificial Skylights: Uses edge-lighting technology combined with special film to create the impression of depth and distance.
- Virtual Sky Panels: High-end options that use advanced light diffusion and sometimes even projected imagery to create ultra-realistic sky appearances, including clouds and sun positions.
Artificial sky panels installed in a suspended ceiling system, creating a realistic blue sky effect
2.2 Benefits of Artificial Skylights
The popularity of artificial skylights continues to grow in 2025 for several compelling reasons:
- Wellbeing Benefits: Studies show that exposure to natural light patterns—even simulated ones—can reduce stress, improve mood, and enhance cognitive function. According to a 2024 study in the Journal of Environmental Psychology, spaces with artificial skylights showed a 22% improvement in occupant satisfaction compared to standard lighting.
- Energy Efficiency: Modern LED artificial skylights use up to 70% less energy than older lighting systems while providing better quality light.
- Installation Flexibility: Unlike traditional skylights, artificial options can be installed in any room—including basements, bathrooms, interior rooms, and apartments.
- No Weather Concerns: Traditional skylights can leak, accumulate snow, or transmit excessive heat. Artificial options eliminate these concerns entirely.
- No Structural Modifications: Installing a traditional skylight requires cutting through roofing and ceiling materials—a complex and invasive process. Artificial skylights typically require only minor ceiling modifications.
— Dr. Maria Sanchez, Healthcare Design Consultant
2.3 LED vs. Natural Skylights: A Comparison
Before deciding on an artificial skylight, it's helpful to understand how they compare to traditional options:
| Feature | Traditional Skylights | Artificial LED Skylights |
|---|---|---|
| Initial Cost | $1,000-$3,000 for standard sizes plus $1,500-$3,000 for professional installation | $400-$2,000 for quality systems plus $200-$800 for installation |
| Installation Complexity | High - requires roofing work, waterproofing, structural modifications | Low to Moderate - primarily electrical work and minor ceiling modifications |
| Light Quality | Natural sunlight with full spectrum and natural variations | Simulated light with good color rendering (90+ CRI in premium models) |
| Weather Impact | Affected by weather conditions; may create excessive heat or appear dark during storms | Consistent light regardless of outside conditions |
| Long-term Costs | Potential for leaks, regular inspection required, higher insurance costs | Bulb/LED replacement after 15,000-50,000 hours, minimal maintenance |
3. Pre-Installation Considerations
A successful artificial skylight installation begins with proper planning and preparation. Before purchasing any materials or making modifications to your ceiling, take time to address these important considerations.
3.1 Planning Your Skylight Placement
Strategic placement is crucial for creating a convincing and effective artificial skylight installation:
- Room Traffic Patterns: Position skylights in areas where they'll be naturally visible but not directly above high-traffic paths where glare might become an issue.
- Ceiling Obstructions: Before finalizing locations, check for ceiling joists, electrical wiring, plumbing, HVAC ducts, and any other obstructions that might interfere with installation.
- Natural Logic: For the most convincing effect, place artificial skylights where real skylights would logically appear—typically centered in a space or aligned with architectural features.
- Multiple Unit Arrangement: If installing multiple units, arrange them in a pattern that appears intentionally designed rather than randomly placed.
3.2 Tools and Materials
Gather these essential tools and materials before beginning your installation:
Basic Tools:
- Measuring tape and pencil
- Stud finder
- Drywall saw or appropriate cutting tool for your ceiling type
- Drill with various bits
- Screwdriver set
- Level
- Electrical tester
- Wire strippers and connectors
- Safety glasses and dust mask
- Stepladder or scaffolding
Materials:
- Artificial skylight unit
- Mounting hardware (specific to your ceiling type)
- Electrical wire (14/2 or as specified by manufacturer)
- Junction box if not included with skylight
- Drywall repair materials (if modifying existing ceiling)
- Trim pieces (as needed for finished appearance)
- Dimmer switch (if not included and desired)
- White caulk or sealant for finishing edges
3.3 Safety Considerations
Before beginning installation, prioritize safety with these precautions:
- Electrical Safety: Always turn off power at the circuit breaker before doing any electrical work. Use a circuit tester to verify power is off before proceeding.
- Weight Considerations: Ensure your ceiling can support the weight of your chosen artificial skylight. Some high-end units can be quite heavy and may require additional structural support.
- Dust Protection: Cutting ceiling materials creates dust. Use proper eye protection, dust masks, and consider plastic sheeting to protect furniture and flooring.
- Ladder Safety: Use a proper stepladder or scaffolding with stabilizers. Never stand on the top steps of a ladder or use makeshift platforms.
- Professional Consultation: If you're unsure about structural concerns or electrical requirements, consult a professional before proceeding.
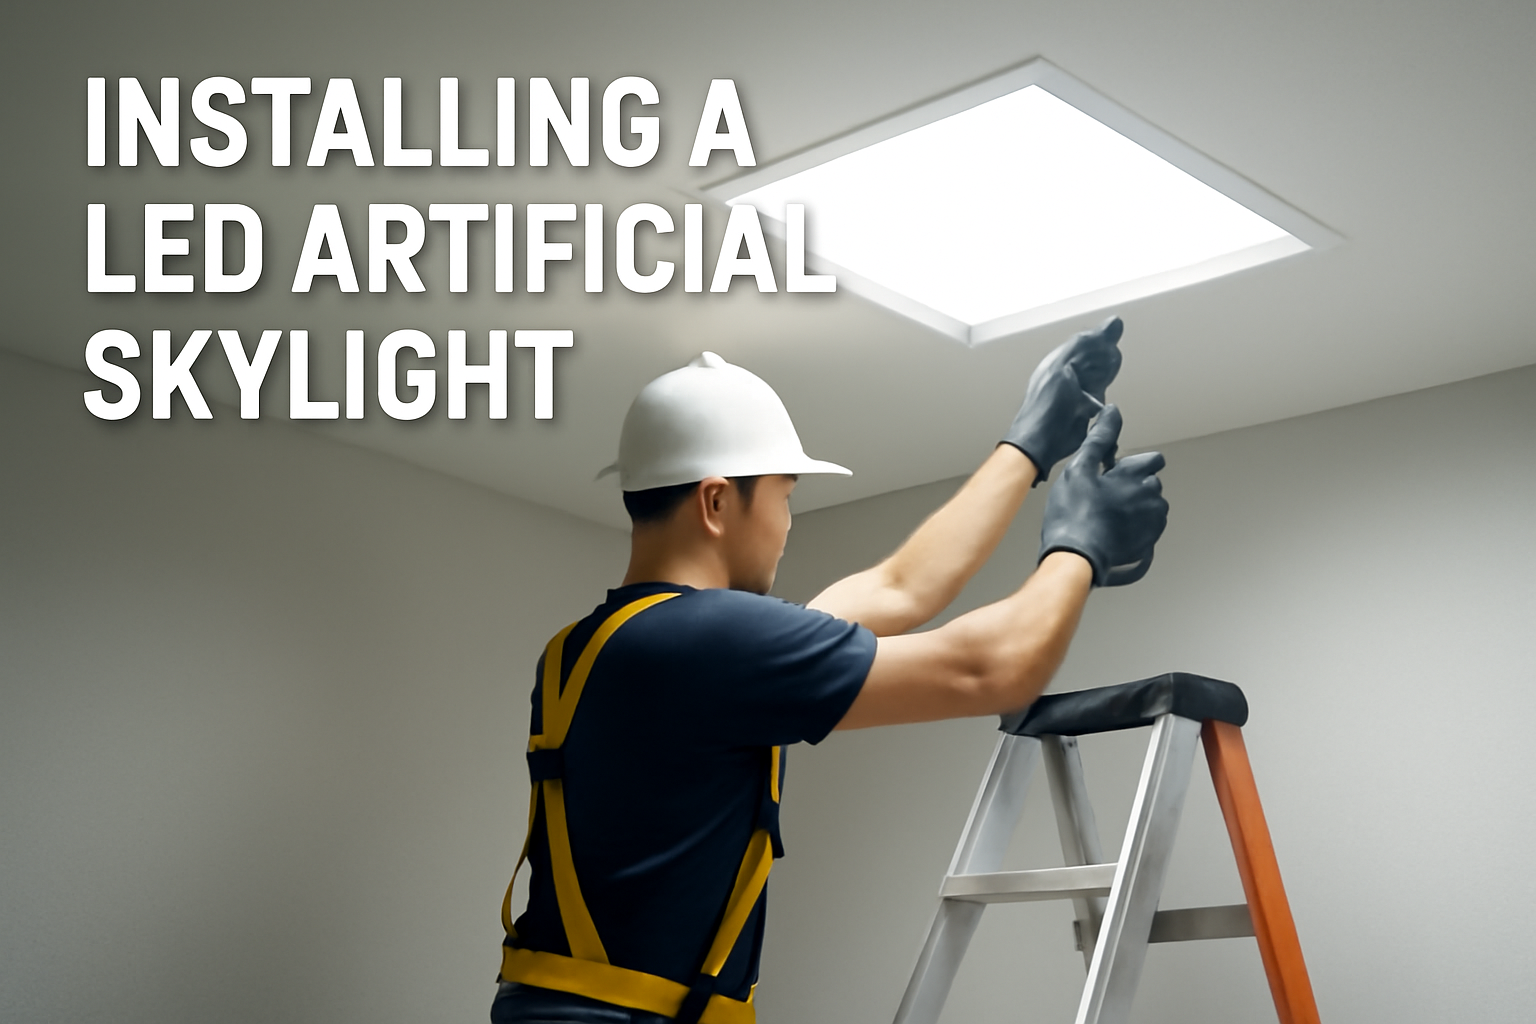
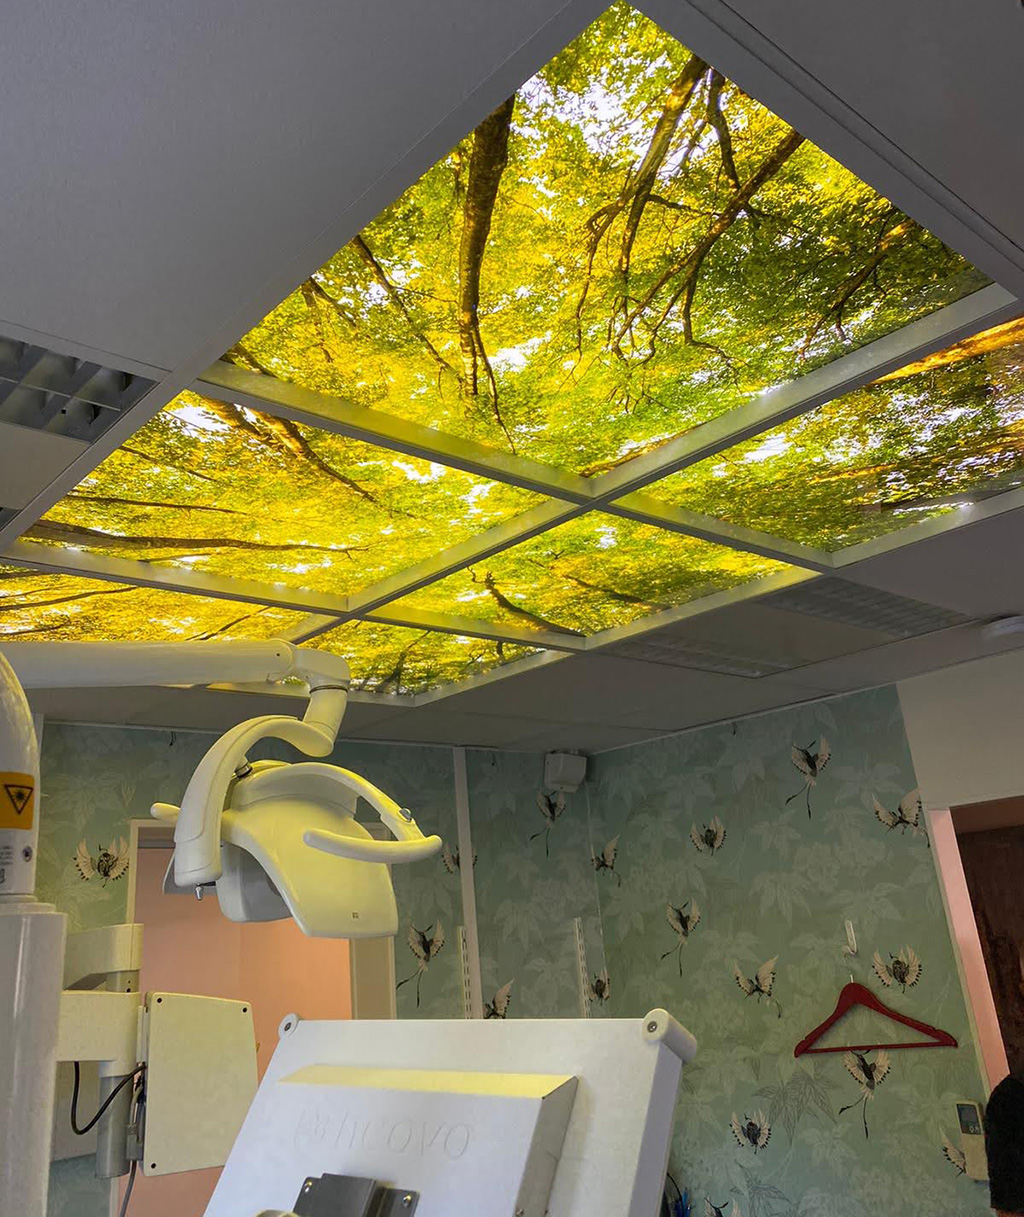
4. Installing in Drywall Ceilings
Drywall ceilings are the most common residential ceiling type, making them a frequent candidate for artificial skylight installations. Their solid surface provides a good foundation, but proper installation requires careful planning and execution.
.jpg)
Preparation work for skylight installation in a drywall ceiling
4.1 Specific Challenges and Solutions
Installing artificial skylights in drywall ceilings presents several specific challenges:
-
Joists and Obstructions: Ceiling joists typically run every 16-24 inches, potentially interfering with skylight placement.
Solution: Use a stud finder to map joist locations before cutting. Choose a skylight size that fits between joists or be prepared to create a frame that works around them. -
Recessed Depth: Creating a realistic skylight effect often requires depth, but the space between drywall and the floor/roof above may be limited.
Solution: Choose thin-profile LED skylights designed specifically for shallow ceiling cavities, or consider surface-mounted options that create the illusion of depth through lighting effects rather than actual recess. -
Electrical Access: You'll need power for your artificial skylight, but existing wiring may not be conveniently located.
Solution: Plan to tap into nearby ceiling fixtures or run new wiring from accessible junction boxes. Battery-powered options are also available for locations where wiring is impractical. -
Finishing Details: The junction between the skylight and drywall must look clean and professional.
Solution: Use trim kits designed for your specific skylight model, or install custom trim using lightweight molding. Seal edges with paintable caulk and match paint exactly to your ceiling color.
4.2 Step-by-Step Installation Guide
-
Locate Ceiling Joists and Obstacles
Use a stud finder to identify and mark all joists in the installation area. Check for electrical wiring, plumbing, and HVAC ducts using specialized detectors.
-
Mark the Installation Area
Based on your skylight dimensions and the location of ceiling joists, carefully mark the cutout area using a pencil and straight edge. Double-check measurements before cutting.
-
Turn Off Power
Shut off power to the circuit where you'll be working at the main breaker panel. Verify power is off using a circuit tester.
-
Cut the Opening
Using a drywall saw, carefully cut along your marked lines. For round skylights, use a compass cutter for a precise circle. Make cuts slowly to avoid damaging anything above the ceiling.
-
Create a Frame (if needed)
If your skylight requires additional support or a recessed box effect, construct a frame using 2×4 lumber. Secure it to ceiling joists with appropriate screws.
-
Run Electrical Wiring
Route electrical wiring from your power source to the skylight location. Install a junction box as needed, following local electrical codes.
-
Install Mounting Brackets
Following manufacturer instructions, install any required mounting brackets, ensuring they're level and securely attached to joists or the frame you've constructed.
-
Connect the Wiring
Make electrical connections following manufacturer instructions and local code requirements. Typically, this involves connecting black to black (hot), white to white (neutral), and ground wires.
-
Mount the Skylight Unit
Carefully lift the skylight into position and secure it to the mounting brackets or frame according to manufacturer instructions.
-
Apply Finishing Details
Install any trim pieces included with the skylight. Seal gaps with paintable caulk and touch up paint as needed for a seamless finish.
-
Test the System
Restore power and test your new artificial skylight to ensure all functions work properly, including any color temperature adjustments or smart features.
Here's a helpful tutorial on installing a LED panel skylight in a kitchen ceiling:
4.3 Product Recommendations
These artificial skylight products work particularly well with drywall ceiling installations:
-
LED Recessed Skylights (Budget-Friendly)
These thin-profile LED panels fit directly into drywall cutouts and include built-in diffusers that mimic natural light. Look for models with color temperature adjustability for the most realistic effect. Average cost: $200-$450. -
Frame-Based Artificial Skylights (Mid-Range)
These systems include a frame that creates a recessed box in your ceiling, providing depth that enhances the natural skylight effect. Many include programmable LED lighting that simulates changing daylight. Average cost: $500-$800. -
Smart Artificial Skylights (High-End)
Premium systems like the Pesetech 60W or Azure Artificial Skylight use advanced optics and Rayleigh scattering technology to create convincing blue sky effects. These systems include smartphone control and often integrate with smart home systems. Average cost: $800-$1,500.
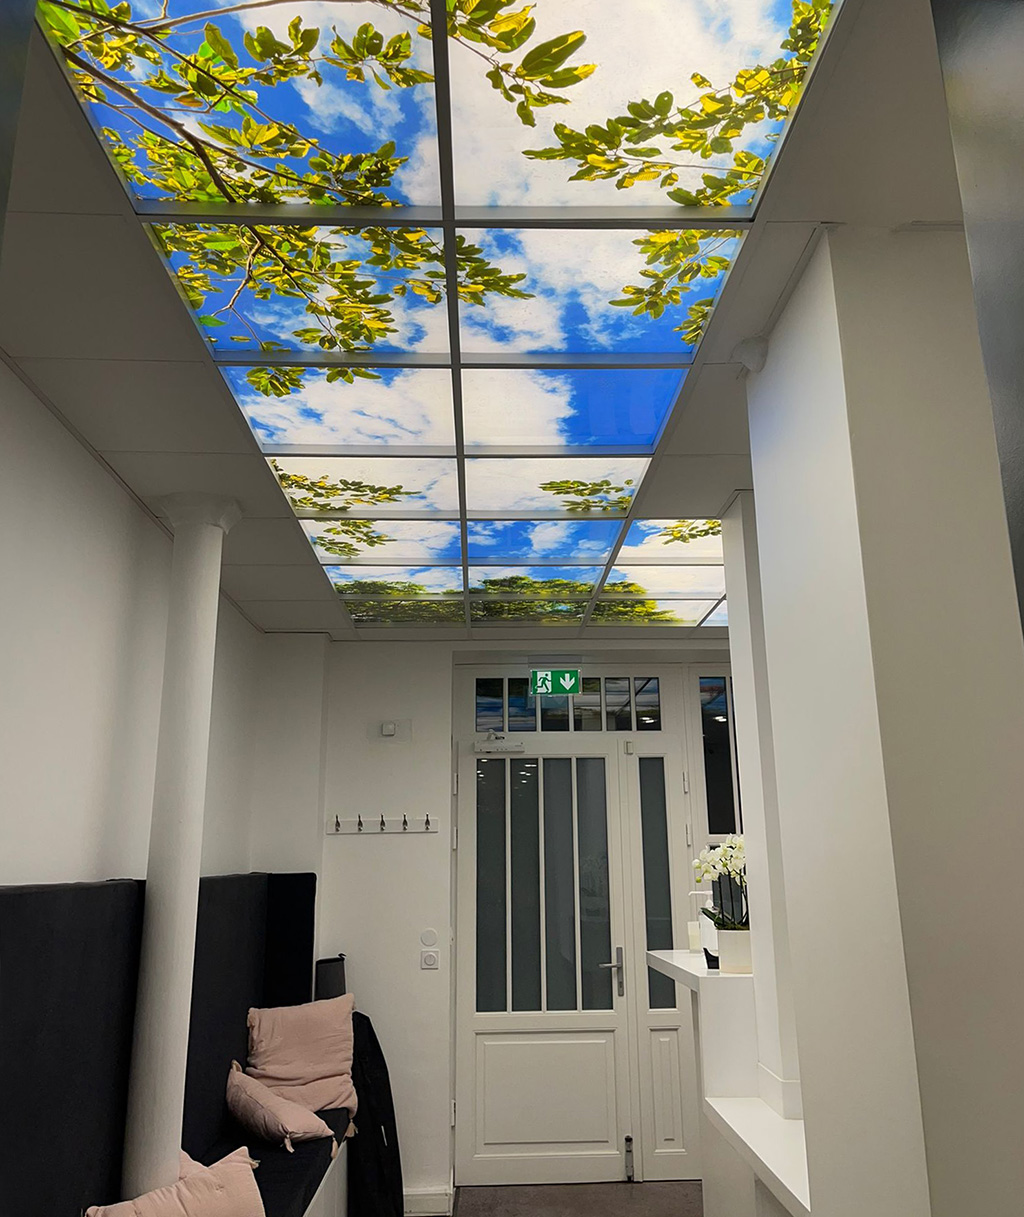
5. Installing in Suspended Ceilings
Suspended (drop) ceilings are common in commercial spaces, basements, and some residential areas. They present a unique opportunity for simple artificial skylight installation since they already feature a grid system designed for modular components.
Sky panels installed in a standard suspended ceiling grid system
5.1 Specific Challenges and Solutions
While suspended ceilings offer many advantages for artificial skylight installation, they also present specific considerations:
-
Weight Limitations: Standard suspended ceiling grids have limited weight-bearing capacity.
Solution: Choose lightweight LED panel skylights designed specifically for grid systems, or install additional wire supports from the structural ceiling above to bear the weight of heavier units. -
Grid Compatibility: Artificial skylights must fit standard grid dimensions (typically 2'×2' or 2'×4').
Solution: Select skylights specifically designed for suspended ceilings, or use custom trim kits to adapt non-standard sizes to your grid dimensions. -
Limited Plenum Space: The area between the suspended ceiling and the structural ceiling above (the plenum) may have limited clearance.
Solution: Measure the plenum height before purchasing and select units designed for your available depth. Some models require just a few inches of clearance. -
Fire Code Compliance: Commercial suspended ceilings often have specific fire rating requirements.
Solution: Verify that your chosen artificial skylight meets local fire codes for commercial applications. Look for products with appropriate UL ratings.
5.2 Step-by-Step Installation Guide
-
Check Plenum Clearance and Obstructions
Remove ceiling tiles in the installation area and check for adequate clearance above the grid. Look for any obstructions like pipes, ducts, or wiring that might interfere with installation.
-
Verify Grid Compatibility
Confirm that your artificial skylight dimensions match your grid system. Standard grids are 15/16" or 9/16" wide, and this will affect how the skylight fits in the opening.
-
Plan Power Supply
Identify a power source in the plenum space or plan to run new wiring from a nearby junction box. Ensure there's enough wire to reach your installation location.
-
Turn Off Power
Shut off power to the circuit where you'll be working and verify with a circuit tester that power is off.
-
Install Additional Support (if needed)
For heavier artificial skylight units, install support wires from the structural ceiling to the grid where the skylight will be placed. Follow local building codes for proper support spacing.
-
Modify Grid (if necessary)
If your skylight requires multiple grid spaces, you may need to remove cross members. Ensure the grid remains properly supported according to manufacturer specifications.
-
Connect Electrical Wiring
Following manufacturer instructions and local codes, connect the electrical wiring to power your artificial skylight. Use proper connectors and junction boxes.
-
Install the Skylight Unit
Carefully angle the skylight above the grid and lower it into position. For direct-replacement tile models, this is similar to installing a standard light fixture in a drop ceiling.
-
Secure Unit to Grid
Follow manufacturer instructions to secure the skylight to the grid system. This may involve clips, screws, or other fastening methods.
-
Test and Adjust
Restore power and test your skylight. Make any necessary adjustments to settings, position, or trim to ensure a proper fit and appearance.
This video demonstrates the installation of a virtual sun panel in a grid ceiling:
5.3 Product Recommendations
These products are particularly well-suited for suspended ceiling installations:
-
Drop-in Sky Panels (Budget-Friendly)
These direct-replacement LED panels fit standard grid dimensions (2'×2' or 2'×4') and install just like acoustic ceiling tiles. They provide basic sky imagery with even illumination. Average cost: $150-$350 per panel. -
ProSky Panels (Mid-Range)
Specialized for suspended ceilings, these panels feature high-resolution sky imagery and edge lighting for enhanced realism. They're designed to meet commercial building requirements and fit standard grid dimensions. Average cost: $400-$700. -
Artificial Sky Commercial Series (High-End)
Premium systems designed specifically for commercial environments feature dynamic lighting that changes throughout the day, energy efficiency ratings for LEED certification, and compatibility with building management systems. Average cost: $800-$2,000 per panel.
6. Installing in Concrete Ceilings
Concrete ceilings present the most challenging scenario for artificial skylight installation, but with the right approach, even these solid surfaces can be transformed with the appearance of natural light from above.

Artificial LED skylight installed directly on a concrete ceiling surface
6.1 Specific Challenges and Solutions
Concrete ceilings present unique installation challenges:
-
Surface Mounting Necessity: Unlike other ceiling types, you cannot cut into structural concrete ceilings.
Solution: Use surface-mounted artificial skylights or create a dropped frame structure to house a recessed unit. -
Mounting Difficulty: Concrete requires special fasteners and tools for secure attachment.
Solution: Use concrete anchors rated for ceiling installation and the weight of your skylight. Consider professional installation for the anchoring process. -
Wiring Challenges: Running electrical wiring through concrete is virtually impossible without pre-existing conduits.
Solution: Use surface-mounted conduit or wire molding to bring power to the skylight location, or consider pendant-style artificial skylights that can be wired from an existing ceiling junction box. -
Aesthetic Concerns: Surface-mounted units may not look as integrated as recessed options.
Solution: Choose thin-profile models designed specifically for surface mounting, or create a decorative soffit or light well that enhances rather than detracts from the design.
6.2 Step-by-Step Installation Guide
Here are two approaches for concrete ceilings: direct surface mounting and creating a dropped housing.
Method 1: Surface Mounting
-
Mark the Installation Location
Use a pencil to mark the center point and outer dimensions of your artificial skylight on the concrete ceiling.
-
Plan Electrical Path
Determine how electricity will reach the location. Options include surface-mounted conduit or tapping into nearby existing fixtures.
-
Turn Off Power
Shut off power to the circuit where you'll be working and verify with a circuit tester.
-
Install Mounting Hardware
Using a hammer drill with a masonry bit, drill holes for concrete anchors according to the skylight manufacturer's specifications. Install anchors rated for the weight of your unit.
-
Install Electrical Box and Conduit
Mount an electrical box at the center point and run conduit to your power source. Pull wires through the conduit according to electrical code.
-
Connect Wiring
Make electrical connections for the skylight unit following manufacturer instructions and local electrical codes.
-
Mount the Skylight
Secure the artificial skylight to the installed anchors, ensuring it's level and properly aligned.
-
Apply Finishing Touches
Use architectural trim pieces to hide conduit if desired, and ensure all mounting hardware is secure.
Method 2: Creating a Dropped Housing
-
Design a Frame Structure
Create a design for a dropped light well that will be suspended from the concrete ceiling. This can be simple or architectural depending on your aesthetic goals.
-
Install Mounting Points
Using a hammer drill, install concrete anchors in the ceiling that will support your frame structure. Ensure these are rated for significantly more weight than your skylight and frame combined.
-
Build the Frame
Construct a wooden or metal frame that will be suspended from the mounting points and house your artificial skylight. This typically resembles a shallow box with an opening at the bottom.
-
Run Electrical Wiring
Run wiring from your power source to the frame location, either through conduit or concealed within the frame structure.
-
Hang and Secure the Frame
Attach the frame to the concrete ceiling using the installed anchors. Ensure it's level and securely mounted.
-
Install the Skylight Unit
Mount the artificial skylight within the frame according to manufacturer instructions.
-
Finish the Frame
Apply drywall, paint, and trim to the frame to create a finished appearance that integrates with your room design.
6.3 Product Recommendations
These products work best for concrete ceiling installations:
-
Ultra-Thin Surface Mount Models (Budget-Friendly)
These LED panels are designed specifically for surface mounting with a profile of less than 2 inches. They include integrated mounting systems for solid ceilings. Average cost: $250-$500. -
Pendant Artificial Skylights (Mid-Range)
These units hang from a single mounting point and create a convincing skylight effect without requiring multiple anchor points in the concrete. Some models can extend 12-24 inches from the ceiling. Average cost: $600-$900. -
Architectural LED Systems (High-End)
These systems include custom-designed housing that creates an architectural feature while incorporating artificial skylight technology. They're specifically designed for challenging installations like concrete ceilings. Average cost: $1,200-$3,000.
— Michael Darden, Commercial Lighting Designer
7. Cost Analysis and Budgeting
Understanding the costs involved in artificial skylight installation helps you budget effectively and choose the right solution for your needs. Here's a comprehensive breakdown of what to expect in 2025:
| Cost Factor | Budget Range ($) | Mid-Range ($) | Premium ($) |
|---|---|---|---|
| Equipment Costs | 150-350 | 400-800 | 900-3,000+ |
| Professional Installation | 200-400 | 450-700 | 800-1,500 |
| Electrical Work | 100-250 | 300-500 | 550-900 |
| Structural Modifications (if needed) | 0-200 | 250-500 | 600-1,500 |
| Finishing Materials | 20-50 | 75-150 | 200-500 |
| Total Typical Cost Range | 470-1,250 | 1,475-2,650 | 3,050-7,400 |
Key cost factors to consider:
- Ceiling Type Impact: Installation costs vary significantly by ceiling type. Suspended ceilings typically offer the lowest installation costs, while concrete ceilings generally require the highest investment in mounting hardware and labor.
- Size Considerations: Larger artificial skylights provide more dramatic effects but cost proportionately more. 2'×2' is typically the smallest standard size, with costs increasing significantly for units 4'×4' or larger.
- Technology Features: Smart features like app control, color temperature adjustment, and automated day/night cycles add to the cost but enhance realism and user satisfaction.
- Energy Efficiency: Higher-priced models often feature more efficient LED technology, potentially offsetting some cost through energy savings over time.
- DIY vs. Professional Installation: While DIY installation can save on labor costs, professional installation ensures proper electrical connections and may be required to maintain warranty coverage for premium units.
8. Maintenance and Longevity Tips
To maximize the lifespan and performance of your artificial skylight, follow these maintenance recommendations:
-
Regular Cleaning
Dust accumulation can dim light output over time. Clean diffuser panels quarterly using a soft microfiber cloth and non-abrasive cleaner suitable for plastic. For hard-to-reach installations, consider using an extended duster specifically designed for ceiling fixtures.
-
Check Electrical Connections
Every 6-12 months, turn off power and inspect visible wiring and connections for signs of wear or heat damage. Loose connections can cause flickering and reduce LED lifespan.
-
Monitor for Moisture
If your artificial skylight is installed in a bathroom or other high-humidity area, regularly check for condensation or moisture inside the unit which could indicate sealing issues.
-
Update Firmware/Software
For smart artificial skylights, keep controller software updated to benefit from manufacturer improvements and ensure continued compatibility with home automation systems.
-
Verify Mounting Security
Particularly for concrete and suspended ceiling installations, periodically check that mounting hardware remains secure. Building vibration over time can loosen fasteners.
-
Plan for LED Replacement
Though LEDs are long-lasting, they do eventually dim. Most quality artificial skylights use LEDs rated for 25,000-50,000 hours (approximately 8-17 years at 8 hours of daily use). Check if your model offers replaceable LED components to extend service life.
9. Frequently Asked Questions
Can artificial skylights provide vitamin D like natural sunlight?
No, standard artificial skylights do not produce the UVB radiation necessary for vitamin D synthesis in the skin. Some specialized therapeutic light systems do produce controlled amounts of UV, but these are medical devices rather than decorative skylights and require proper safety protocols.
How much energy do artificial skylights use compared to standard lighting?
Modern LED artificial skylights are highly efficient, typically consuming 30-60% less energy than equivalent traditional lighting. A standard 2'×2' artificial skylight panel uses approximately 30-40 watts, while providing illumination equivalent to much higher wattage traditional lighting. Smart models with dimming capabilities can further reduce energy consumption.
Can I install an artificial skylight in a rental property?
Yes, there are several rental-friendly options. Surface-mounted models that install like standard light fixtures can replace existing ceiling lights without permanent modification. For suspended ceilings, tile-replacement units can be installed and later removed when moving out. Always check your rental agreement and consider consulting with your landlord before installation.
How realistic do artificial skylights actually look?
Quality varies significantly by price point. Budget models provide enhanced ambient lighting with basic sky imagery. Mid-range products create convincing effects from most viewing angles. Premium systems using advanced optics technology, proper color temperature (5000K-6500K), and simulated depth can be remarkably convincing—visitors often mistake them for real skylights, especially in rooms where actual skylights would be logical.
Do I need an electrician for installation?
While experienced DIYers can install many artificial skylight models, professional installation is recommended for several scenarios: if you're uncomfortable working with electrical wiring, if your chosen location has no existing lighting circuit, if you're installing in concrete ceilings requiring special anchoring systems, or if local building codes require licensed electricians for such installations. Some manufacturers also require professional installation to maintain warranty coverage.
10. Conclusion and Final Recommendations
Artificial skylights represent a transformative innovation in interior lighting, offering the psychological and aesthetic benefits of natural light without the structural complications, weather concerns, or high costs of traditional skylights. As we've explored throughout this guide, installation approaches vary significantly based on your ceiling type, but solutions exist for virtually every scenario.
For optimal results, consider these final recommendations:
- Match Technology to Purpose: If you're primarily seeking improved ambient light and mood enhancement in a space, mid-range options offer excellent value. For spaces where visual impact is paramount or where you want to create a true illusion of outdoor connection, investment in premium systems with advanced optics is justified.
- Prioritize Installation Quality: Even the most advanced artificial skylight will disappoint if poorly installed. Take time with placement planning, ensure proper electrical connections, and give special attention to finishing details that integrate the unit with your ceiling.
- Consider Control Systems: The ability to adjust light intensity and color temperature significantly enhances the usefulness and realism of artificial skylights. Smart systems that automatically adjust throughout the day provide the most convincing experience and align with natural human circadian rhythms.
- Plan for Multiple Units When Possible: For larger spaces, multiple smaller units often create a more balanced and natural effect than a single large skylight. This approach also provides installation flexibility around ceiling obstructions.
As artificial skylight technology continues to evolve and prices gradually decrease, these systems are becoming increasingly accessible for both residential and commercial applications. The psychological and aesthetic benefits they provide make them a worthwhile investment for any space lacking natural light.
Whether you're brightening a basement, enhancing a windowless bathroom, or transforming a commercial interior, artificial skylights offer a practical solution that bridges the gap between traditional lighting and actual architectural skylights—bringing the sky indoors regardless of your ceiling type.